This cake was actually supposed to be August's cake, because that's when it was completed, and then graduate school took over my life and I never got it written up, until now. Hopefully I will also soon be having some spectacular holiday-themed cakes to post as other "December's Cakes," but for now we'll just have to let this flowery cake warm up the drab winter days:
Not many people know this about me, but WAY back in high school I used to be a frequent watercolor painter - I had a free period my last semester of high school that I'd designated as "scholarship application work time" but our supervising teacher, along with all the students who had a similar class setup, decided to take every other Friday to do something creative. Being as we met in the library, and couldn't make too much of a mess, drawing and watercolor painting became that creative outlet. I even invested in a set of watercolors and a couple decent paintbrushes (which I still have) during college freshman year that I would use when I was stressed or had too much creative energy pent up (as engineering turned out not to be the bastion of creative problem solving I'd been promised but instead an attempt at as much standardizing of our methods and minds as in the book 1984).
Starting my second semester of college, however, I began to have (very time consuming) drafting classes. While they took up nearly all of my free time, they also provided something of a creative outlet, and so I forgot about the watercolor painting. Then, this last spring Craftsy released a free class this spring called "Hand-Painted Cake." This watercolor cake has been floating around in my head ever since then, taking slightly different forms and colors. I finally found time for it this month and am SO HAPPY with the way it turned out!
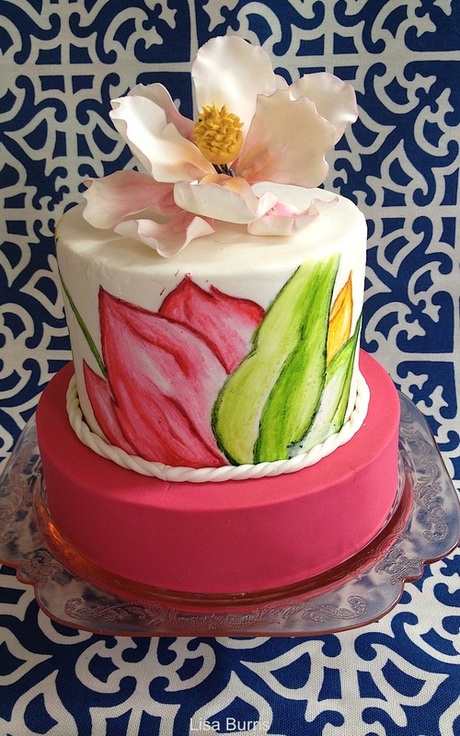
 Image from a very talented artist at http://afternoonartist.wordpress.com
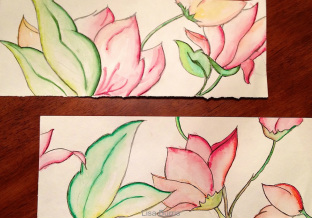
 Creating this cake required several steps that I think are likely unique to watercolor cake design. After scouring the internet for inspiration, I decided on something similar to this:
I measured out two panels that would be the height of my cake and were long enough to fit around the cake's circumference and drafted up some patterns. I made two sets - one with just the lines of the flowers and leaves and one that I drew on watercolor paper, so that I could practice watercolor painting, decide on the colors I wanted, and have a reference while painting the real cake.
A few days later I covered a styrofoam dummy with fondant (actually in this case I just peeled the pearls off the pearl cake so that I could reuse that fondant - fondant is expensive, y'all!).
I traced the flower designs onto parchment paper, covered the cake's fondant in crisco and pressed the paper, graphite side in, onto the side of the cake. Its sort of like making a big cake sticker. I then traced the pattern onto the side of the cake, leaving leaves a faint line of graphite all over the cake.
The next step in creating a watercolor cake is mixing and testing the 'paint' colors. In the cake world 'paints' are either composed of gel food coloring or petal/luster dusts mixed with vodka. As I have a plethora of gel colors and only a couple pots of petal dusts, I opted for the gels.
Side note: I noticed the paint colors beading up on the Crisco-ed surface of the cake. I got around this by mixing my paints more thickly and basically (carefully) globbing it onto the surface in several layers. I have since learned that my mistake was that I was basically trying to mix oil and water (Crisco and the vodka/gel mixture). Evidently the key is using oil-based "paints" such as luster dust mixed with flavoring oils (like for candy flavorings) or coconut oil. The same goes for painting on modeling chocolate.
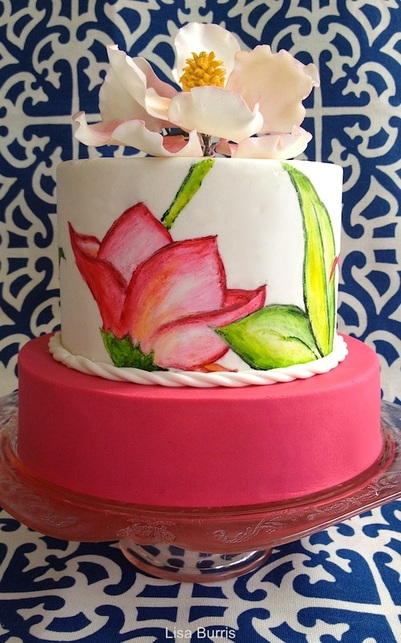
So, after mixing colors to my desired hue (easier said than done, btw!) I outlined all of the flowers and leaves in the very concentrated colors. Finally, I diluted the colors and filled in all of the petals and leaves, layering colors to achieve the areas with deeper hues.
After the cake dried I placed it on half of a 9" tier covered in Wilton's new bright pink fondant (YAY! Finally!!!), added a fondant rope border. I purchased an extruder, for making ropes and other borders, AGES ago and have just never had an opportunity to use it - its totally nerdy, but I was really excited to bust that sucker out for this project. The rope adds a finishing touch that just wouldn't have been as good if I'd had to pipe a bead border or something like that.
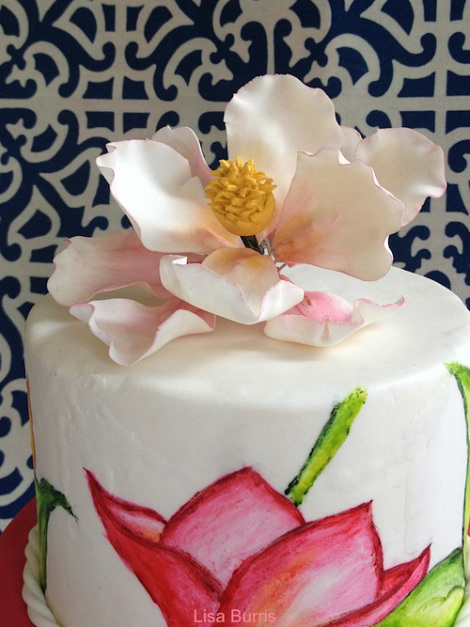
To finish the cake I topped it with a gumpaste magnolia I'd created and dried a few days before. I dusted the inside of the flower with pink petal dusts to tie it to the rest of the cake's colors.
After the cake dried I placed it on half of a 9" tier covered in Wilton's new bright pink fondant (YAY! Finally!!!), added a fondant rope border. I purchased an extruder, for making ropes and other borders, AGES ago and have just never had an opportunity to use it - its totally nerdy, but I was really excited to bust that sucker out for this project. The rope adds a finishing touch that just wouldn't have been as good if I'd had to pipe a bead border or something like that.
To finish the cake I topped it with a gumpaste magnolia I'd created and dried a few days before. I dusted the inside of the flower with pink petal dusts to tie it to the rest of the cake's colors.
Here's something I noticed while working on this cake and also on my research work - tests used by other disciplines and industries are often the ones that fill needs you didn't realize you had and answer questions you've been struggling with. In the same way, the more cake decorating I do, the more I'm finding that incorporating techniques from other art forms makes for really beautiful cakes. This watercolor technique opens up a whole realm of new fun and gorgeous cake possibilities. With how well this project turned out I'm sure you'll be seeing more watercolor cakes on this blog in the future!
Happy Holidays, everyone!
Lisa
Happy Holidays, everyone!
Lisa
 RSS Feed